![21 Best Free Driver Updater Software For Windows 10/8/7 [Latest 2022]](https://wpcontent.innovanatechlabs.com/blog_innovanatechlabs/wp-content/uploads/2021/07/28133532/Best-driver-updater1-1-830x420.jpg)


![21 Best Free Driver Updater Software For Windows 10/8/7 [Latest 2022]](https://wpcontent.innovanatechlabs.com/blog_innovanatechlabs/wp-content/uploads/2021/07/28133532/Best-driver-updater1-1-65x65.jpg)


Get the Logitech K350 driver’s updated version downloaded and installed to avoid keyboard performance issues. Read this post to learn how to do it effectively.
Logitech’s K350 wireless keyboard is among the most preferred keypads by modern-day users. However, sometimes it may not work the way you want it to. It happens particularly when the needed drivers are missing or outdated. To avoid keyboard performance issues, we recommend you download the Logitech K350 driver’s updated version.
Downloading and installing the latest driver helps the keyboard to communicate with the computer effectively. And, this leads to the perfect execution of your commands. Therefore, through this post, we talk about the ways to download, install, and update the Logitech K350 driver.
Table of Contents
show
Methods to Download the Logitech K350 Driver, Install, and Update it
Below are the quick and easy ways to get the Logitech K350 driver download, install, and update effectively.
Method 1: Download the Needed Driver through Logitech’s Website
You can find all the drivers you need for Logitech products on its official website. However, before proceeding further, you must know the operating system of your computer. To know that, follow the trail Settings>System>About. After knowing the OS, follow these instructions to download the updated Logitech K350 driver and install it.
- Click here to visit the website of Logitech.
- Hover over the Support tab and choose Downloads from the drop-down menu.

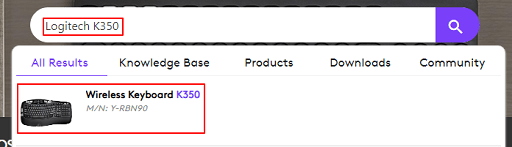
- In the “How can we help you?” box, input Logitech K350 and select it from the results.
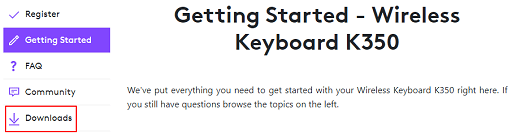
- Choose Downloads from the left pane of the screen that comes up.
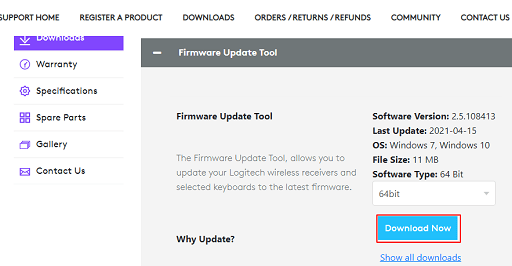
- Select your operating system and expand the Firmware Update Tool section.
- Click on the blue-colored Download Now button visible on your screen to download the driver file.
- Double click on the downloaded file and install the Logitech K350 driver on your computer.
Method 2: Use Device Manager to Download the Updated Logitech K350 Driver
Another option you have is to download, install and update the Logitech K350 driver using Device Manager. Below we show you how to do it step-by-step.
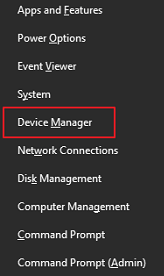
- Use the combination of keys Windows and X to launch the menu to access the Device Manager.
- Select Device Manager from the options on your screen.
- Unhide the category of Keyboards.
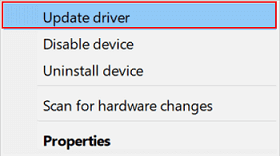
- Right-click on the Logitech K350 keyboard and select Update driver.
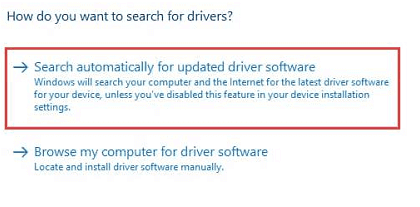
- Search automatically for updated driver software.
- Restart the PC after Windows is done downloading and installing the updated Logitech K350 driver.
Method 3: Allow the Operating System to Update
Updating the operating system is also among one of the most followed manual methods to get the updated driver. However, you may not be able to download the Logitech K350 keyboard software if Windows 10 fails to find it. Windows may be unable to detect the driver updates if they are released only a while ago. However, you can still follow these steps to test your luck.
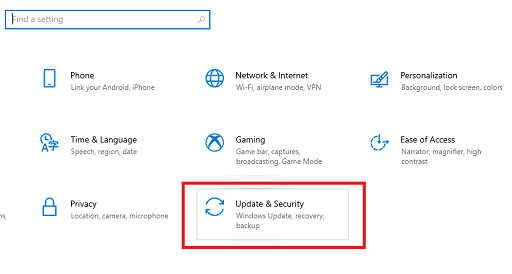
- Open Settings using the Windows and I key combination.
- Select Update & Security from the options you get on the screen.
- Check for updates.
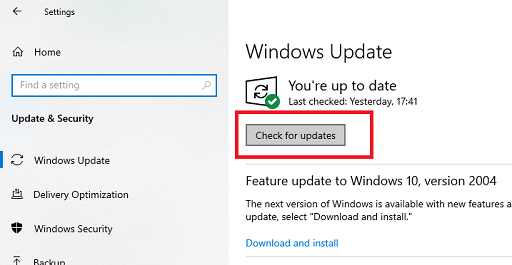
- Download the suggested update and install it on your computer.
- After completing the above steps, restart the computer.
Method 4: Download and install the updated Logitech K350 driver automatically (Recommended):
If you are one of those users who prefer smart work over hard work and don’t want to go through a long series of steps, then try this method. You can download, install, and update all the needed drivers with only a few clicks.
All that you have to do is get a competent driver updater, like Bit Driver Updater, to complete the task automatically. This software needs you to follow only a quick and simple series of steps, provides you with options like driver download speed acceleration, and ensures to fetch you the most reliable driver updates.
We have reviewed Bit Driver Updater in greater depth. You can take a look at that deep review to get acquainted with this software.
Below is how to update the Logitech K350 and all the other drivers with Bit Driver Updater.
- Click on the link shared here to download Bit Driver Updater’s setup file.

- Click on the downloaded file and complete the installation of Bit Driver Updater.
- Allow the software to scan your computer deeply for a few seconds.
- After the scan is complete, go through the flagged drivers and click on the Update All button to get them updated.
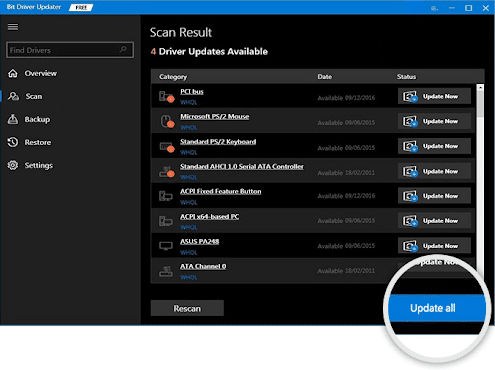
If you only want to download and install the updated Logitech K350 driver, you can do it by clicking on the Update Now button located next to it. However, we recommend updating all the drivers for improved PC performance.
Logitech K350 driver downloaded, installed, and updated
Through this article, we discussed different ways to download, install, and update the Logitech K350 driver on Windows 10. You can follow any of these approaches to complete the task. However, for your convenience, we suggest you perform it automatically with Bit Driver Updater.
It helps you get the driver updated effortlessly and also fixes driver-related PC performance issues. If you know any other better ways to get the driver to download, install, and update, then let us know through the comments section below.