![21 Best Free Driver Updater Software For Windows 10/8/7 [Latest 2022]](https://wpcontent.innovanatechlabs.com/blog_innovanatechlabs/wp-content/uploads/2021/07/28133532/Best-driver-updater1-1-830x420.jpg)


![21 Best Free Driver Updater Software For Windows 10/8/7 [Latest 2022]](https://wpcontent.innovanatechlabs.com/blog_innovanatechlabs/wp-content/uploads/2021/07/28133532/Best-driver-updater1-1-65x65.jpg)


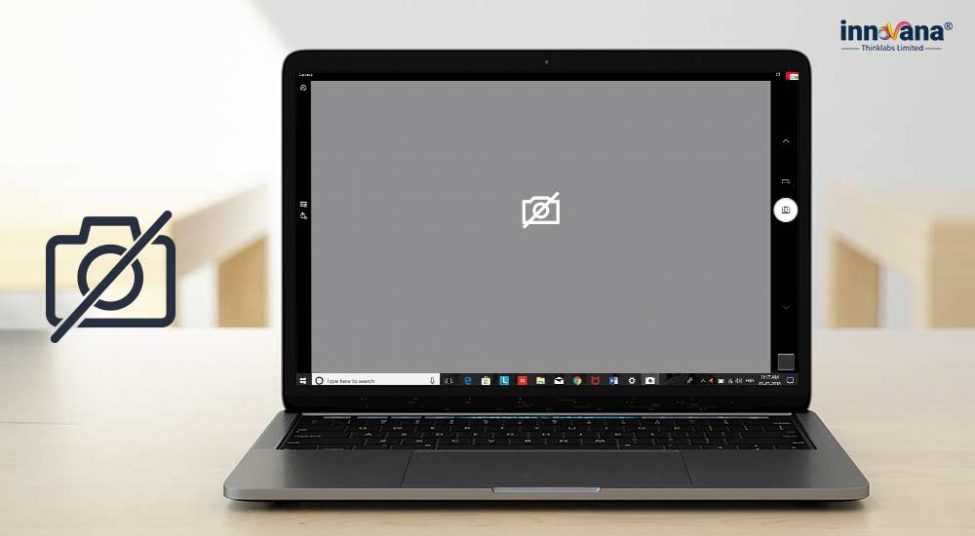
This write-up brings to the fore some simple solutions that you can try if your Windows 10 laptop camera is not working.
Lockdown times have made us realize how precious those fun meetings with friends and family are. In the present scenario, we cannot enjoy the warmth of the in-person meeting. But, the webcam brings the same closeness and fun on our computer screens. A webcam is all you need to meet virtually. Further, professional meetings are also now increasingly being conducted through webcams.
In such a situation, if the Windows 10 camera is not working, then this can surely be frustrating. But you don’t need to worry as this write-up talks about the sure-shot fixes for a dysfunctional Windows camera.
Thus, if your Windows laptop camera is not working, then this post is the only guide you need to fix the issue with ease.
Now, without more delay, let’s begin fixing the Windows camera if it is not working.
Highly recommended fix if Windows 10 Camera is not working
However, if you know that the reason behind your Windows 10 Camera problem is your problematic drivers, then you can easily fix the issue using Bit Driver Updater. We have mentioned this at the end of this write-up as well. Hence, if you want to know more about this, then you can directly refer to the last method. Before that, download the Bit Driver Updater from here.

Table of Contents
show
Windows 10 camera is not Working- 100% Working Fixes
Below are the fixes that you need to resolve the issues if Windows 10 camera is not working. Work your way down the solutions until you reach the one that works for you perfectly.
Solution 1: Try running hardware troubleshooter
Windows comes with an in-built troubleshooting mechanism to fix most of the common problems including webcam issues. Thus, if Windows 10 camera is not working, then you can run the hardware troubleshooter to resolve the problem. Below are the steps to run it.
Step1 : In the bar where it is written “Search for anything”, type “Control Panel”.
Step2 : Click on the first search result that comes up on the screen.

Step3 : After the Control Panel window comes up, click on “View by” and select “large icons” from the drop-down menu.
Step4 : Choose “Troubleshooting”.

Step5 : Once the Troubleshooting window appears, select “View All” from the window’s left pane.

Step6 : Click on “Hardware and Devices”.

Step7 : Choose “Next” and follow the instructions that come up on the screen.
Solution 2: Install the camera again
Many users reported that reinstalling the camera helps resolve the issues if the Windows 10 laptop camera is not working. You can also try doing it and see if it works for you or not.
Step1 : In the search bar adjacent to the Start icon, type “Device Manager” and click on the first search result.

Step2 : Expand the “Imaging devices” category and right-click the webcam that you are using.
Step3 : Select “Uninstall device” from the menu that you see on the screen.

Step4 : Restart your computer.
On restarting, Windows automatically installs the latest camera drivers to fix the issues if the Windows 10 camera is not working.
Solution 3: Install the camera in compatibility mode
Windows comes with an in-built utility that fixes the compatibility problems between the programs that you want to install and operating system. Installing cameras in the compatibility mode can fix the incompatibility issue and make your laptop camera work if it is not working. Thus, below are the steps to install the camera in compatibility mode.
Step1 : Visit the webcam manufacturer’s website and download the camera drivers. For instance, if you are using Logitech C920, then go to Logitech’s official website for downloading drivers.
Step2 : Save the driver setup file on the local disk.
Step3 : Right-click the driver setup file that you have just saved and select “Properties”.
Step4 : Move to the “Compatibility tab” and checkmark “Run this program in Compatibility mode for”.
Step5 : Choose the operating system from the list that appears on the computer’s screen.

Step6 : After the driver install is finished, restart your PC.
Solution 4: Roll back the driver
Sometimes, the camera driver that you have installed may not be compatible with your device and be the reason for which Windows 10 camera is not working. Therefore, you can roll back the driver to make the camera work. Here’s the series of steps to do it.
Step1 : Open “Device Manager” and expand the “Imaging devices” section.
Step2 : Right-click the webcam that you are using and select “Properties” from the menu that appears.

Step3 : Move to the “Driver” tab and click on “Roll Back Driver”.
Step5 : Click on “Yes” and after the roll back completes, restart your PC.
Solution 5: Pay heed to antivirus software
Although having the best antivirus installed is essential to keep your PC free from threats, still antivirus may be the reason for which Windows camera is not working. Therefore, check the blocking settings of the antivirus that you are using and unblock the webcam if it is blocked.
Solution 6: Turn on the camera access
Your device’s privacy settings may not be allowing the Windows 10 camera to work. Therefore, you need to check the settings and allow the camera access. Here’s how to do it.
Step1 : Click on the Start icon and select “Settings” from the menu that pops up on the screen.

Step2 : In the search box, type “Webcam”.
Step3 : Select “Webcam privacy settings”.
Step4 : Turn on the “Let apps use my camera” toggle.

Solution 7: Update webcam drivers via Bit Driver Updater
Outdated, faulty, and missing webcam drivers are one of the prime reasons for which Windows 10 camera is not working. Therefore, updating the webcam driver can fix this issue in no time. You can adopt two routes to do the same, one is the manual update route and another is the automatic route. We suggest you go the automatic route as updating drivers automatically through Bit Driver Updater is relatively simpler and less time-consuming. Now, the question that pops up is how to use this utility. Below are the steps to use it and get rid of all the hardware related issues on your PC.
Step1 : Install Bit Driver Updater from the download button given below.
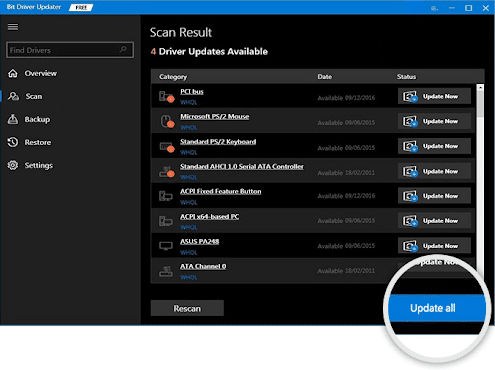
Step2 : Launch it and select “Scan” from the left pane of Bit Driver Updater’s window.
Step3 : After the scan ends, review the results and click on “Update Now” to update the webcam drivers. In case you want to get rid of all the out of date drivers in one shot, then click on “Update All”.
Yes, it is this simple to fix the issues using Bit Driver Updater if the Windows laptop camera is not working. Thus, don’t think twice before clicking the download button below and give your PC a new lease of life.
Windows 10 camera is not working- Resolved
Through this write-up, we learned the ways to fix the problems if the Windows 10 camera is not working. We hope that we were successful in helping you out. Do let us know what you feel in the comment box below and stay tuned with Innovana Blog for more such tech solutions.