![21 Best Free Driver Updater Software For Windows 10/8/7 [Latest 2022]](https://wpcontent.innovanatechlabs.com/blog_innovanatechlabs/wp-content/uploads/2021/07/28133532/Best-driver-updater1-1-830x420.jpg)


![21 Best Free Driver Updater Software For Windows 10/8/7 [Latest 2022]](https://wpcontent.innovanatechlabs.com/blog_innovanatechlabs/wp-content/uploads/2021/07/28133532/Best-driver-updater1-1-65x65.jpg)


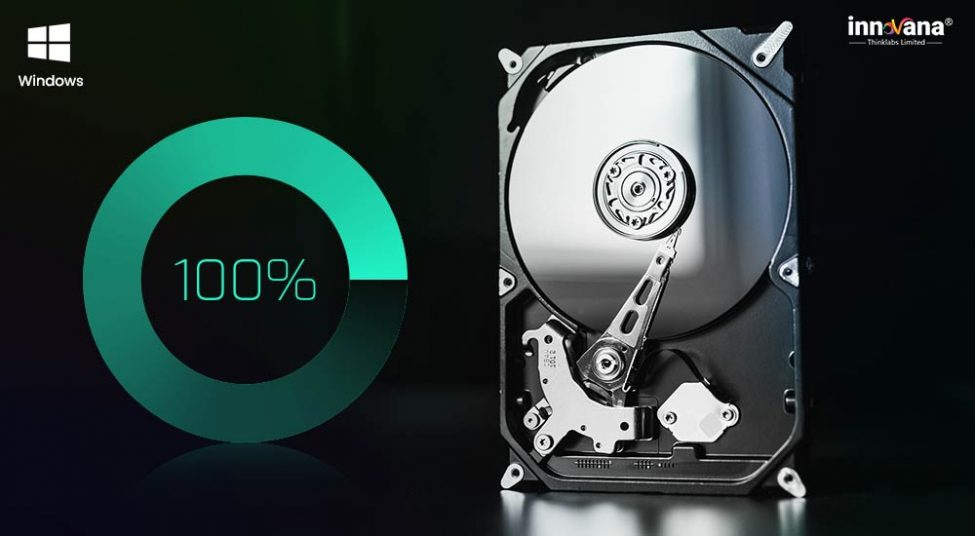
Today, we are discussing various effective methods to fix 100% disk usage in Windows 10. You might have noticed that your Windows 10 PC has started lagging and performing quite slow. In this situation, we probably try to inspect the issue with the help of the Task Manager. However, while doing this, some people have reported that the Windows Task Manager of their PC is showing 100% disk usage. You might get surprised after seeing it, as the last time when you have checked this, there was enough space for disk usage. And since then, you have not even installed any heavy software that can consume that much space. Don’t worry as it can just be another error that can be fixed by following some proper instructions. Here, we are going to provide you some methods to fix 100% disk usage in Windows 10. This problem can occur due to various reasons, and hence we have provided multiple solutions as per the different situations. So, let’s start with the guide to fix the problem of 100% disk usage in Windows 10.
Top Recommendation to Fix the 100% Disk Usage in Windows 10
A broken, missing, or outdated driver is among the top reasons for which you face 100% disk usage issue in Windows 10. Therefore, updating the drivers is the best way to fix it. You can use Bit Driver Updater, an automatic utility to update the drivers with a single click. In addition to one-click driver updates, it also offers many highly-useful features, such as driver backup and restore, increasing the driver download speed, creation of a system restore point, and more. We share its download link below.

Table of Contents
show
Methods to Fix 100% Disk Usage in Windows 10
Below are the possible solutions to fix 100% disk usage in Windows 10. Kindly follow the instructions with attention in order to properly fix the problem.
Method 1: Fix your Device Drivers.
The problem of 100% disk usage in Windows 10 can occur due to some broken, missing, or problematic drivers. Hence, you have to fix them to resolve the problem of 100% disk usage in Windows 10. The best way through which you can update your device drivers is by updating them with Bit Driver Updater. We know that time is quite important for everyone. Hence, we have brought the most time-saving solution to update device drivers. Bit Driver Updater can help you to update your device drivers automatically. If you do not have the software installed on your computer, then you can download it from here:
Another benefit of Bit Driver Updater is that it easily gets installed, just like any other random software. You only have to follow the instructions of the wizard. Once you have Bit Driver Updater on your computer, you just need to follow these few simple steps.
- Open the Bit Driver Updater application and wait for it to check all your drivers.
- Now, you’ll have a list of drivers that needs to be updated. Update them all by just clicking on the Update all option.

- Bit Driver Updater will automatically update all your drivers, wait for some time. After it gets complete, simply restart your PC and check whether the issue got resolved or not.
Manual Method to Update Device Drivers
You can also update your drivers manually, although it can be a little time consuming and ineffective way to do so. Here are the steps that you can follow to update your drivers manually through Windows Update.
1. Open the Start Menu by clicking the Start icon on the Windows Taskbar.
2. Then select the Settings option to open the Windows Settings screen.

3. Look for the Update & Security settings and click on them.
4. Now select the Windows Update tab from the various tabs available at the left side of the Window.
5. At last, you have to click on the highlighted Check for updates button to make the Windows search for the latest drivers and update them as well.

However, if the issue doesn’t get resolved by updating the drivers, then you have to try some other alternative methods that we have mentioned below.
Method 2: Change Settings of Background Running Apps
Sometimes, the background runnings apps like Skype and Chrome can also cause the 100% disk usage in Windows 10 error. Hence, you can try to resolve this error by making changes to the settings of such applications. There are different methods to do so as the settings differ from each particular application to another.
Make changes with Chrome settings:
In Chrome, you can do it by following the path Settings > Advanced > Privacy & Security and then disable Use a prediction service to load pages more quickly option. Furthermore, also check whether the Continue running background apps when Google Chrome is closed option is disabled or not.

Make changes with Skype settings:
However, if you want to make changes in the settings of Skype, you have to edit its security permissions. You can do it by following the below steps.
1. Right-click on the .exe file of the Skype application.
2. Now click on the Properties and select the Security tab.
3. In the Security tab, you have an Edit option, click on it.
4. After that, click on ALL APPLICATION PACKAGES and then click on Allow checkbox in front of the Write.
5. At last, click on Apply and then finish it by clicking on OK.
After following the above-mentioned steps, if the problem persists, then follow the other methods of the guide to fix 100% disk usage in Windows 10.
Method 3: Disable Services such as Superfetch
You can try fixing the 100% disk usage problem by disabling the Superfetch service. Here are the steps that you can proceed with to disable Superfetch
1. Search for Services in the Windows search box and click on the topmost search result.
2. After opening the Services Window, look for Superfetch in it.

3. Then select Superfetch and right-click on it to expand the drop-down menu.
4. From the drop-down menu, you have to select Properties.
5. Once the properties tab gets open, click on the Startup type box and then select Disabled.

6. After selecting the Disabled, click on stop and then Apply.
7. Finish it by clicking on OK.
Now check the Task Manager again to verify that the problem got resolved or not. If not, then follow some other methods of this guide.
Method 4: Try Disabling Prefetch
Along with Superfetch, you can also try disabling Prefetch to fix 100% disk usage in Windows 10. Here are the steps that you need to follow to disable Prefetch.
Step 1: Search Registry Editor in the Windows Search box.
Step 2:. Now, click on the top search result of your search and open Registry Editor.
Step 3: After opening the Registry Editor, you have to follow the mentioned path:
HKEY_LOCAL_MACHINE\SYSTEM\CurrentControlSet\Control\Session Manager\Memory Management\PrefetchParameters.

Step 4: Now, double-click on EnablePrefetcher.

Step 5: A small tab will get opened. You have to edit the value of Prefetcher from 3 to 0 and then click on OK.
Now, restart your computer and check whether the issue got fixed or not by disabling Prefetch.
Method 5: Stop and Disable Windows Search
It is another method that people try to fix the 100% disk usage problem in Windows 10. It is similar to disabling Superfetch, and the steps are also common.
Step 1: Just like we have opened Services for Superfetch, open it for disabling Windows Search as well.
Step 2: Now, look for Windows Search and right-click on it.

Step 3: Select Properties from the drop-down list here as well.
Step 4: Now in the Properties, click on the Startup type box and then select Disabled.
Step 5: After that, click on stop and then Apply.
Step 6: Complete it by clicking on OK.
Method 6: Reset the virtual memory of your computer
If you are not familiar with virtual memory, let us tell you about it. Virtual memory is a kind of replacement for your computer’s actual physical memory. But, the system only uses it when your RAM gets full and cannot support any further task. The primary function of virtual memory is to provide support to the RAM. So, it might be possible that there is some issue in the virtual memory that is causing 100% disk usage issue. You can overcome this problem by resetting the virtual memory. In order to do this, you need to follow the below steps.
Step 1: Open the Control Panel of your Windows 10 PC by searching for it in the Windows Search box.
Step 2: Now, select System from the items available in the Control Panel.

Step 3: After clicking on System, you have to click on Advanced system settings available on the left side of the Control Panel Window.

Step 4: Once the Advanced system settings get opened, click on the Advanced tab.
Step 5: In the Advanced tab, you also have to click on Performance Settings.
Step 6: Now again, click on the Advanced tab in Performance options.
Step 7: Then after that, select the ‘Change…’ button.
Step 8: If the ‘Automatically manage paging file size for all drives’ checkbox is marked, then unmark it.
Step 9: Click on the drive in which you have installed the Windows on your Computer.
Step 10: Now reset the initial size and maximum size.
Step 11: After resetting the sizes, click on Set option and then OK to finish the resetting of virtual memory.
Step 12: Once you have reset the virtual memory, you have to remove all the temporary files from your computer. You can do it with the help of the Windows Run utility. Just search Run in the Windows Search box and open it. After that, type ‘temp’ in the text box and click on OK. It will provide you all the temporary files, select them all and completely remove them from your PC.
After following the above steps, check whether the problem still exists or not.
Method 7: Try Disabling Windows Update Services
Windows Update service is another disk utilizing-function of the Windows operating system. Some experts also claim it as a reason for the 100% disk usage problem. However, you can easily solve the problem is the reason is Windows Update. You just have to disable the Windows Update. The steps are quite similar to the steps that we have mentioned for disabling other services such as Superfetch and Windows Search.
Step 1: Open the Services as we have mentioned before.
Step 2: Then look for Windows Update in the list of different Services.

Step 3: Right-click on Windows Update and select Properties from the expanded menu.
Step 4: You have to select the Startup type box and then Disabled.
Step 5: After that, click on stop and then Apply.
Step 6: At last, click on OK.
Method 8: Try Changing the Power Performance from Balanced to High Performance
This is another hack to fix 100% disk usage in Windows 10. Some people have claimed that this has worked for them. Hence, you may also try changing the power performance of your Windows PC from balanced to high performance. Here are the steps that you can follow to do so.
Step 1: Open Control Panel of your Windows PC. You can open it by searching for it in the Windows Search box.
Step 2: Then click on the Power Options from the different Control Panel Items available.

Step 3: Now in the Power Options settings, click on Change plan settings.
Step 4: After that, select Change advanced power settings to open a Power Options dialog box.
Step 5: Click on the power performance box to open a drop-down menu and then select High Performance from it.
Step 6: Now complete the changes by clicking on OK and restart your PC.
Method 9: Make Changes in File Explorer options
Just like the other methods mentioned above, this method also worked for some people while they tried to fix the issue of 100% disk usage. So, you can also give it a try. It just takes a few seconds to make changes in File Explorer options. Here are the steps that you have to follow to do so.
Step 1: On your Windows 10 Desktop screen, double-click on the This PC icon.
Step 2: Now on the left side, click on Quick access to open File Explorer.

Step 3: In the File Explorer Window, click on View from the options available at the top.
Step 4: Then, from the View menu, click on Options.
Step 5: Now, click on the Search tab.
Step 6: Check if the options such as “Include compressed files (ZIP, CAB…)” and “Always search file names and contents (this might take several minutes)” are marked or not. If it is marked, then unmark them and click on Apply.

Step 7: At last, click on OK to complete the changes.
[Fixed] 100% Disk Usage in Windows 10
So, these are some tested methods that we suggest to you to fix 100% disk usage in Windows 10. There is not a specific reason for this error. Hence, you can not rely on a single method to fix it unless you know the reason. You have to try multiple methods to resolve the issue and know the actual reason for it. All the methods that we have mentioned above are effective. So, you can rely on them to solve the 100% disk usage issue in Windows 10.
If you want to know solutions to more such problems, then subscribe to Innovana blogs and after that bookmark the page as well.